Expected due date: 18-12-2022
Learning Objectives:
Tasks:
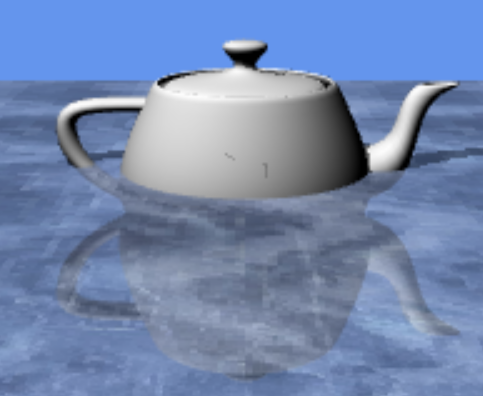
The first part of the project is to create the reflected object and the scene. The scene consists of the teapot and ground scene we used during the implementation of the shadow mapping from Lab 9. Using this scene we can now implement a trivial form of reflection where the entire scene is just reflected across the reflective surface. In this scene's case we want to use the ground as the reflective surface and reflect the teapot across it. In order to achieve the reflection we have to render another teapot model unto the scene and translate it's model matrix so that it is reflected across the ground. The most basic form of achieving this would be to scale the y value by -1 so that the second teapot (from now the reflective surface will be referred to as the reflector) is flipped on the y-axis. Formally, a reflection especially an arbitrary reflection such as the one we are describing here is broken down into the following steps:
Mathematically the transformation matrix that will be used for these steps can be described by the following in where vertex $P$ on the planar reflector's surface and a vector $V$ represents the perpendicular:
$$ R = \begin{pmatrix} 1 - 2V^2 & -2V_xV_y & -2V_xV_z & 2(PV)V_x \ -2V_xV_y & 1-2V_y^2 & -2V_yV_z & 2(PV)V_y \ -2V_xV_z & -2V_yV_z & 1-2V_z^2 & 2(PV)V_z \ 0 & 0 & 0 & 1 \end{pmatrix} $$ In our case the we use the transformation matrix to do the steps in different multiplications of transformation matrices instead of using the one transformation matrix due to it being simpler to code. At this point we have a teapot bouncing up and down on the other side of the ground. We have to remove the ground to see it. Which ends up in the following image:

During this step it is important to also reflect the lighting camera in order to get the lighting to also be reflected correctly on the reflector teapot. Otherwise the lighting of the reflector will still be from a top-down perspective.
During this part we have to enable the blending of the ground in order to give the illusion that the teapot is being reflected. To do this we have to change the texture of the ground so that it is transparent there are a few ways we have learned throughout the course to do this but the simplest way would be to change the fragment color's alpha as we did in Lab 8. This is shown in the code below:
vec4 origColor = texture2D(texture, fTexCoord);
gl_FragColor = vec4(origColor.rgb * visibility, 0.80);
We also have to enable the program to allow for blending of texture by using the following:
gl.enable(gl.BLEND);
gl.blendfunc(gl.SRC_ALPHA, gl.ONE_MINUS_SRC_ALPHA);
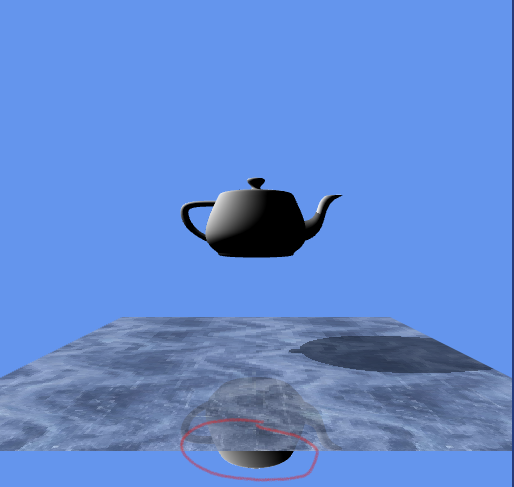
This is a hard coded transparency of 20% and a better solution would be to send down from the application a transparency value that can be used in place of the hardcoded value. Regardless, the result from this part is a teapot that can clip through the ground and break the immersion of reflection. Instead the teapot looks like it is dipping into the ground and clashing with the reflector as shown in the image below:
In this part we are learning about stencil clipping which is a technique to clip world objects. The fundamentals of the stencil technique we will be using for this part is as follows:
We will follow these fundamental steps by first allowing that the stencil can be used with the following lines of code:
var gl = WebGLUtils.setupWebGL(canvas, {alpha: false, stencil: true});
gl.enable(gl.STENCIL_TEST);
We can now use a stencil to buffer the data just like a depth buffer would. To create the stencil we use the follow the steps in the Reference Guide. The first step is to define the stencil function from the following lines of code:
gl.stencilFunc(
    gl.EQUAL,    // the test
    0,            // reference value
    0xFF,         // mask
);
Then we define what happens if the stencil test fails, if the depth test fails, and what to do if both tests pass by the following lines of code:
gl.stencilOp(
    gl.KEEP,     // what to do if the stencil test fails
    gl.KEEP,     // what to do if the depth test fails
    gl.KEEP,  // what to do if both tests pass
)
We can now change the value of the stencil in the application depending on if the teapot is below the ground level or not. The results of a stencil buffer are similar to that of a different approach of using a clipping plane as described in the the next part. For similar results we can check in the fragment shader if the teapot is above the clipping plane by using the following code:
if(dot(fWorldPosition, clip) > 0.0){
    discard;
}
During the implementation for the previous part we learned about using the stencil buffer to manually change what gets drawn based on conditions known in the application layer. In this part we will discover a different approach to culling models by using culling planes. Culling planes are planes in the world space that cull all data past that plane from the scene. One major culling plane we have seen and explored in the course are the near and far culling planes of the view matrix. Where anything farther than the far plane of the camera will not be drawn. We can use similar approach to solve the problem that we have in our scene. Currently when the teapot's reflection drops below the ground we are able to still see it, ruining the immersion of the reflection as shown in the image below:
Instead we want the teapot to be drawn up to a plane that is diagonal in the scene. This plane stretches from the eye position to the ground edge and beyond. This plane will cull anything that drops below it, and thus any point of the reflection teapot that is visible beyond the ground. A simple way to do this is to define the culling plane as a 4 dimensional vector (a,b,c,d) in where:
$$ 𝑎x + 𝑏y + cz + 𝑑 = 0 $$
We then use this plane and map it to the near culling pane of the camera using the following code:
 function modifyProjectionMatrix(clipplane, projection) {
 // MV.js has no copy constructor for matrices
 var oblique = mult(mat4(), projection);
 var q = vec4((Math.sign(clipplane[0]) + projection[0][2])/projection[0][0],
 (Math.sign(clipplane[1]) + projection[1][2])/projection[1][1],
 -1.0,
 (1.0 + projection[2][2])/projection[2][3]);
 var s = 2.0/dot(clipplane, q);
 oblique[2] = vec4(clipplane[0]*s, clipplane[1]*s,
 clipplane[2]*s + 1.0, clipplane[3]*s);
 return oblique;
 }
This way of clipping objects is called the oblique clipping method. Which is adequate for the solution of this lab. It builds on the way of clipping world objects which is defined by plane clipping which consists of the following steps:
discardWe can implement a similar solution by defining the plane and passing it to the fragment shader using the following code to determine whether or not to draw the fragment:
if(dot(fWorldPostion, clip) > 0.0){
    discard;
} else if(dot(fWorldPosition, groundClip) > 0.0){
    discard;
}
Lab Finished!
Report Finished!
Report Merged!