Learning Objectives:
Purpose of this set of exercises is to load a triangle mesh that models something more interesting than a box. Once the model is loaded, we will apply lighting and shading using the techniques from Worksheet 4.
Tasks:
This lab is about loading external content unto the webpage. As such, the first part suggests to the student that they should place the deliverables from the labs unto the student homepage. Since I started this course already hosting the website on a Heroku server then I will follow the suggestions but apply them there instead. However, it is still good to know how to connect and use the student homepage. As such this section will be about getting the S213061 Website up and running on DTU GBar. The first thing that needs to be done is connect to DTU using the DTU VPN in order to be in the same domain for security reasons. This is done by using the CISCO client as shown in the guide Once the connection is successful we can now access GBar by using the ThinLinc client for the Linux server, by following the instructions in GBar Introduction Guide which will act as a remote desktop connection. Then all we have to do is use a SSH file transfer application like FileZilla to connect our data storage and transfer the necessary HTML, CSS, and JavaScript files. The website is now up and running but it just links to the Heroku website.
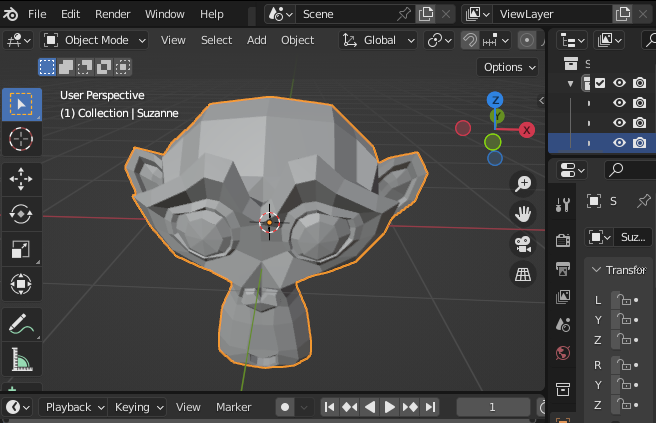
This part was done using blender and the 3D object that was created is
just the blender monkey. The monkey is a default object in blender and can
be added to the scene by simply pressing shift-a then
clicking on the monkey.
In order to load the object file we can use the provided function by the
book called OBJdoc and the respective method of
parse. Using this JavaScript class we can call the
parse method which will take in; a file-path, the scale
factor for the model , and the direction on how to read the file. This
method is at the center of loading the object model into the vertex and
fragment shaders. Altering what we had from previous lab exercises, we can
have an init function as seen below:
 canvas = document.getElementById("gl-canvas-3");
        gl = WebGLUtils.setupWebGL(canvas);
        if (!gl) {
            alert("WebGL is NOT available!");
            return;
        }

        gl.viewport(0, 0, canvas.width, canvas.height);
        gl.clearColor(CLEARCOLOR);

        // Drawing parameters
        gl.enable(gl.DEPTH_TEST);
        gl.enable(gl.CULL_FACE);
        gl.cullFace(gl.BACK);

        //  Load shaders and initialize attribute buffers
        var program = initShaders(gl, "vertex-shader-3", "fragment-shader-3");
        gl.useProgram(program);

        model = initModel(gl, program,
         "/res/models/monkey.obj", scale);
This sets our import of the model starting from the function
initModel. This function will act as a method call hub
setting up the model and the returning a fully initialized object. This
method is shown below:
gl.a_Position = gl.getAttribLocation(program, 'vPosition');
gl.a_Normal = gl.getAttribLocation(program, 'vNormal');
gl.a_Color = gl.getAttribLocation(program, 'vColor');

// Prepare empty buffer objects for vertex coordinates, normals, and colors
var model = initVertexBuffers(gl);

// Start reading the OBJ file
readOBJFile(obj_filename, gl, model, scale, true);

return model;
The first method that is called is initVertexBuffers , this
method initializes the vertex buffers for the following aspects of the
models; vertices, normals, colors, and the indices. This method uses the
helper method createEmptyArrayBuffer which simply creates the
buffer object, assign the attribute location to it and enable the
assignment. The initVertexBuffers is shown below:
var o = new Object();
o.vertexBuffer = createEmptyArrayBuffer(gl, gl.a_Position, 3, gl.FLOAT);
o.normalBuffer = createEmptyArrayBuffer(gl, gl.a_Normal, 3, gl.FLOAT);
o.colorBuffer = createEmptyArrayBuffer(gl, gl.a_Color, 4, gl.FLOAT);
o.indexBuffer = gl.createBuffer();
return o;
Once the vertex have been initialized to a corresponding attribute
location, the application can now use the readOBJFile which
will make an HTTP request to load the object file using the afore
mentioned OBJDoc.parse function to do so. The
render method now requires to load the attribute information
and draw the triangles of the model. The render method is only altered by
the following lines of code:
if (!g_drawingInfo && g_objDoc && g_objDoc.isMTLComplete()) {
    // OBJ and all MTLs are available
    g_drawingInfo = onReadComplete(gl, model, g_objDoc);
}
if (!g_drawingInfo) {
    // Wait for the model to load
    requestAnimationFrame(render);
    return;
} else {
    // Draw the 3D object
    gl.drawElements(gl.TRIANGLES, g_drawingInfo.indices.length,
    gl.UNSIGNED_SHORT, 0);
    window.requestAnimFrame(render);
}
The onReadComplete is simply a way to condense the code to an
easier to follow format which binds the buffer data to the correct
attribute location, with every update of the render method.
For this report we are simply reformatting the code from
Phong Shading exercise in Lab 4
, so that they can work with our new code from
Part 3. There is not much
done differently in this lab that was done in the parts mentioned. The
thing that is important here is that the Phong Shading has to be done in
the fragment shader. It is also necessary to add a helper method that will
update the different shading values outside of the
init method, so that they can be updated by the sliders.
Lab Finished!
Report Finished!
Report Merged!